
Contrary to what you may think, you don’t need outdoor space to compost your household kitchen waste.
Composting at home allows you to cut down on the amount of waste you send to landfill, where even biodegradable waste often fails to decompose sufficiently. It is also incredibly easy and gives you a ready supply of compost for your houseplants or neighborhood gardens.
Whether you’re trying to hit your zero waste goals or just want to do your bit to help the environment, we’ll guide you through your first steps in this guide to apartment composting, complete with step-by-step instructions and helpful tips.
Let’s get started!
Benefits of indoor composting
Composting is a microbial process by which organic matter is broken down, resulting in compost.
Compost primarily consists of decayed matter and is added to soil to improve it. It can help plants to grow better without fertilizer, as well as helping soil to better conserve water and preventing runoff. Note that composting is an aerobic process that requires air.
According to the EDA (Economic Development Administration), over 28% of US household waste is made up of food scraps and yard waste – the kind of materials that are ideal for composting.
No problem, you might think, this waste will just compost in a landfill. Wrong!
Landfills rarely have the ideal conditions for decomposition and most of the time, the compostable household waste that you throw in the trash ends up releasing methane, a prominent greenhouse gas.

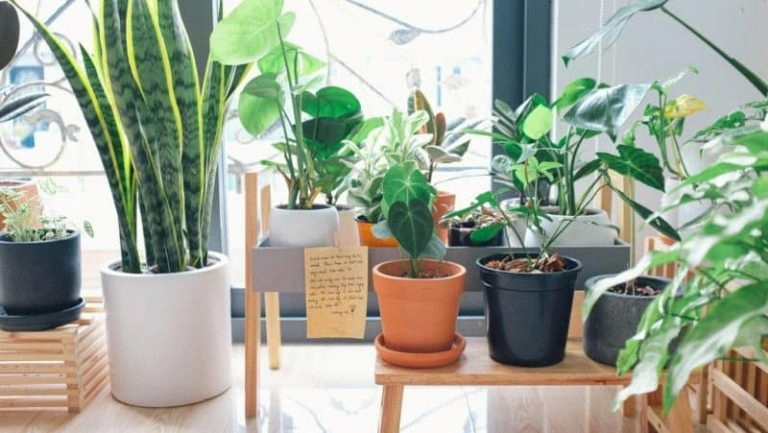
So, by composting your household waste, you are not only creating useful compost that can be used for your houseplants or placed in the flower beds of your local park, you are also helping to reduce climate change.
Composting can also help you to reduce your carbon footprint and work your way towards a zero-waste lifestyle.
But why compost indoors?
You might be a little skeptical, but indoor composting small amounts of organic waste is actually very easy and has its advantages over outdoor composting.
For composting to work correctly, you need to keep it in the steady 40-80 degree temperature range. Too much rainfall, low temperatures, or direct sunlight can all interfere and prevent composting from happening.
Indoors, at room temperature with a specially designed composting container, you can compost your waste all year round. It’s practical, convenient, and does not have to involve odors or worms.
How to compost in an apartment
There are two methods to indoor composting – vermicomposting with worms, and aerobic composting that involves using the microorganisms naturally found in soil.
We’re going to focus on the latter: aerobic composting. Here’s our guide to how to set up your indoor composting container without worms.

Before we get into the specifics, it’s worth quickly going over the basic essentials of indoor composting, so you will better understand what you’ll need.
Composting requires four essential ingredients:
- Air – your compost container will need to have adequate ventilation.
- Brown matter – provides the necessary carbon for composting to take place, as well as helping to add bulk to allow better air circulation.
- Green matter – the organic waste that you’ll be composting, green matter is usually rich in nitrogen or protein, helping the microorganisms to multiply quickly.
- Water – water is necessary for the microorganisms to stay alive; biological activity will cease if your compost dries out. Water also enables them to move from one part of the pile to another.
What you will need to get started
To start composting in your apartment, you will need the following:
- An indoor compost container or bin – size is important, it must comfortably fit the dimensions of where you will be storing it, as well as being capable of holding a week’s worth of organic household waste.
- A power-drill or a sharp instrument – to make holes in your container if it is not a specific aerobic composting bin.
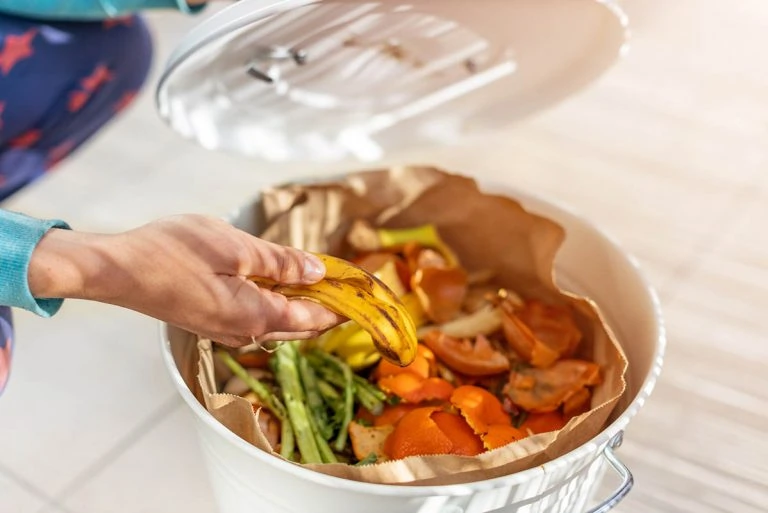
- Brown matter – paper, cardboard, twigs, dead leaves, or branches.
- Green matter – raw vegetable waste, coffee grounds, fruit (see the complete list in tips below).
- Garden soil – this provides the microorganisms.
- A trowel or other implement – for turning over and aerating your compost.
- A watering can or jug – to water your compost.
- A deep tray – to catch any excess water.
To make getting started super easy, check out our guide to the best indoor compost bins and follow our below step-by-step guide to composting in your apartment.
Step 1. Choose and place your container
First of all, you need to choose where you will place your compost container.
It’s best positioned somewhere handy so you can easily access it to add fresh waste and water, with enough space to be able to turn over the contents. Bear in mind that indoor composting doesn’t give off any bad odors (when you follow our advice); at most you’ll experience an earthy scent.
Before placing your container in its location, verify that you have plenty of holes to allow enough air to circulate. You’ll want holes in the top, bottom, and sides. If you are recycling an unwanted plastic container, then use a power drill or a sharp tool to create plenty of small holes. Although you may still get fruit flies, keeping the holes small will limit the potential for larger insects to infiltrate your compost.
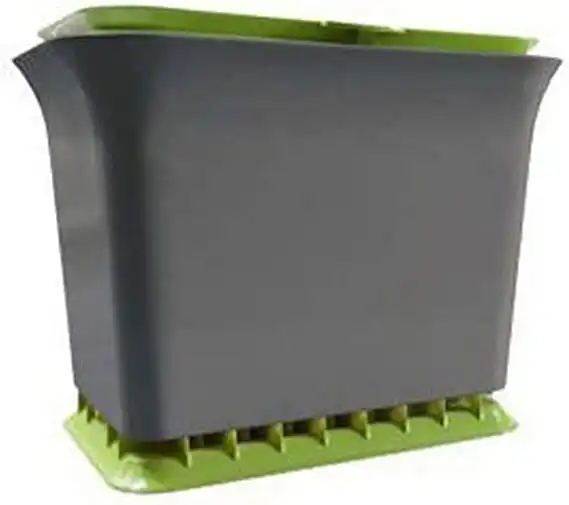
If you can’t cope with the idea of fruit flies, opt for an aerated indoor composting bin like this model by Full Circle with its patented airflow design.
Don’t forget to place your compost container on a deep tray to ensure that any excess water doesn’t go everywhere. This nutrient-rich water can be used diluted to water your plants or be tipped back in.
Step 2. Add the brown matter
Okay, with your well-aerated container set up ready on its tray, you’re ready to start filling it up.
Start off by adding your brown matter. The EPA recommends using an equal amount of brown matter to green, although you may prefer to use two-thirds brown to one-third green.
Step 3. Add some soil
Next, add your soil, this will provide the microorganisms that will get to work breaking down your household waste into compost. Sprinkle a cup of soil over your brown matter and mix.
Step 4. Bury the green matter
Bury your green matter in the soil and brown matter ensuring it’s well mixed in. You’ll never want the green matter to be directly exposed to the air, so make sure it’s always covered by brown matter or soil.
Step 5. Add more soil and brown matter
Add any remaining soil and brown matter to cover your composting mixture and make sure that your green matter is completely covered.
Step 6. Water
Water is essential. If your mixture dries out then it will stop decomposing. Conversely, too much water can lead to odors and mold formation.
Ideally, you want your indoor aerobic composting mixture to have a damp consistency without being drenched. You may find it easier to slightly dampen your brown matter before placing it in your container. Otherwise slowly sprinkle your composting mixture with a watering can and check on its dampness levels later on.
Be sure to aerate your compost when adding new waste, burying it inside the pile so it’s not exposed to the air. Unlike vermicomposting which is naturally aerated by the worms, aerobic composting containers will need their contents turning regularly.
Check the moisture levels regularly too, to ensure that your mixture remains slightly moist at all times.
Top Tips for Better Indoor Composting
To make sure you get off to the best of starts, here are our top tips for better indoor composting – definitely well worth checking out to avoid common beginner errors.
Invest in a decent composting container
You don’t need to struggle with home-made solutions, there’s a whole range of specialized equipment and dedicated indoor composting bins to choose from.
Investing in a specially designed composting bin can give you considerably more placement options. You can find models that are designed to fit in your kitchen drawers or even on your countertop.
Just be sure that your chosen model is suitable for aerobic composting and has plenty of ventilation. If you end up with mold issues or your composting is simply taking too long, then don’t be afraid to drill a few extra holes.
Remember aerobic composting is all about air!
Fight odors and keep bugs out
Some aerobic composting containers come with carbon filters.
These are a great way of allowing air to circulate while preventing any odors. However, when aerobic composting is correctly done, you have virtually no odor whatsoever, just a slight earthy scent.
Keep bugs out with a tight-fitting lid that will also keep your composting intact should it get knocked over. Ensuring you only compost the recommended materials below will also help keep flies away. You should always cover your green matter completely with brown matter and soil so that it is not directly exposed to the air. This will prevent it from attracting any bugs.

If you’re thinking all these holes we’re recommending you put in your container will lead to odors escaping, rest assured that with sufficient airflow, you won’t have odor issues.
If you don’t have sufficient holes, then you will get a build-up of moisture as there won’t be enough air circulation to regulate moisture levels. This can lead to mold formation and a very unpleasant composting experience, so make sure you have plenty of holes and that you regularly aerate your mixture by turning it over!
Make sure you compost the right materials
For indoor aerobic composting, certain types of waste are highly recommended, while others are to be avoided. It’s essential to know which types of waste are suitable for indoor composting to ensure complete decomposition and to avoid strong odors.
Here’s what you should stick in your indoor compost bin:
Green matter
- Raw vegetables
- Raw fruits
- Plants
- Tea leaves
- Coffee grounds
Brown matter
- Twigs
- Tea bags and coffee filters
- Shredded newspaper, cardboard, and paper
- Eggshells
- Nutshells
- Cotton scraps
- Dryer lint
- Hair and fur
- Woolen rags
- Sawdust
Here’s what to avoid putting in your indoor compost container:
- Cooked foods
- Dairy products
- Meat or fish
- Fats or oils
All of the above will create odor problems and can attract rodents and flies, so be sure to keep them out of your composting pile.
Prep your scraps
Before adding your food waste and plant matter to your compost container, you should take the time to prepare them.
For the best results, make sure that you chop or tear all kitchen waste before adding it into the mix. The smaller the chunks, the faster the soil microbes will be able to break them down, resulting in faster decomposition.
Indoor Composting FAQ
Do you need worms for indoor composting?
No, you don’t need worms for indoor composting.
While vermicomposting is considered to be better than aerobic composting, you can get by just fine without them. In fact, many people start off aerobic composting and once they get used to the idea of composting indoors, they then progress to vermicomposting.
One reason vermicomposting is better, is because you get the same breakdown from soil microorganisms but it’s further enhanced with worm castings.
Worm castings are high in nutrients and are highly beneficial for plants. What’s more, the worms’ movements help to aerate your composting mixture, so you don’t have to work as hard turning it over.
However, if you’re not looking to create the best quality compost and you don’t fancy the thought of worms in your house, then aerobic composting will be the best choice for you.
Do indoor compost bins smell?
No. When done correctly, indoor compost bins should only give off a slight earthy smell – no different than that of your household plant’s pot of soil.
Normally, if your indoor compost bin starts to smell it’s down to one of the following:
- Too damp – add some extra brown matter and water less frequently.
- Not enough airflow – add more holes and a brick to raise the bottom off the tray.
- Too much food in the bin – add less food, less frequently. Composting takes time and you need to keep your green levels balanced to match your brown matter.
Wrapping Up
You don’t need a garden, or even a balcony, to start composting to reduce your carbon footprint.
Indoor composting is a great way to free up landfills from organic household waste that can easily be turned into a useful, natural product instead of a deadly greenhouse gas.
It’s also really easy to do and once you’ve set up your composting container, you can compost indoors all year round, thus reducing your household waste and making a positive change for the environment and future generations.