It’s important know how to test a solar panel so that you can to check the output to make sure you’re getting the power you need, as well as verify that your system is working properly. Furthermore, if you want to sell power back to the grid you’ll need to demonstrate that it’s been comprehensively tested.
For this reason, it’s very important important to know how to test a solar panel.
How to test a solar panel: what to know before getting started
Before you jump into testing your solar panel, there are a few basics you should know. We’ll cover the main points below, and you can read more with our guides to monocrystalline vs polycrystalline solar panels, the best solar panels, and potential energy calculator.
Electricity basics
if you want to learn how to test a solar panel, it’s important to be familiar with the basic terminology around power and electricity before you can test your solar panel.
Essential terms include:
- AC – Alternating current
- DC – Direct current
- Watts – A measure of power
- Amp – Or ampere, a measure of current that measures the rate at which energy flows through a line
- Voltage – Another measure of current, that essentially measures the amount of energy flowing at a particular time
AC and DC are the two classifications of electrical current. Direct current is so named because it only flows in one direction, and is used for low voltage appliances and equipment, such as solar panels.
Solar panels usually measure in volts. Watts are typically used to measure power usage in household appliances.
Therefore, if you’re using your solar panel to power your home, you’ll most likely need to measure the output in watts, which obviously involves a conversion.
Wattage represents the power output, while the voltage measures the current that is flowing through your panel. The voltage is equal to the wattage, divided by the amps.
Or in simple terms:
Voltage = Watts / Amperes
Therefore, if you want to know how much power your panel is producing and work out whether this meets your needs, you’ll need to measure both the wattage and the voltage.
Determining the amperage of your solar panel
Before you can measure your solar panel’s wattage and voltage, you first need to know how many amps it produces, as this is an essential factor in the calculation.
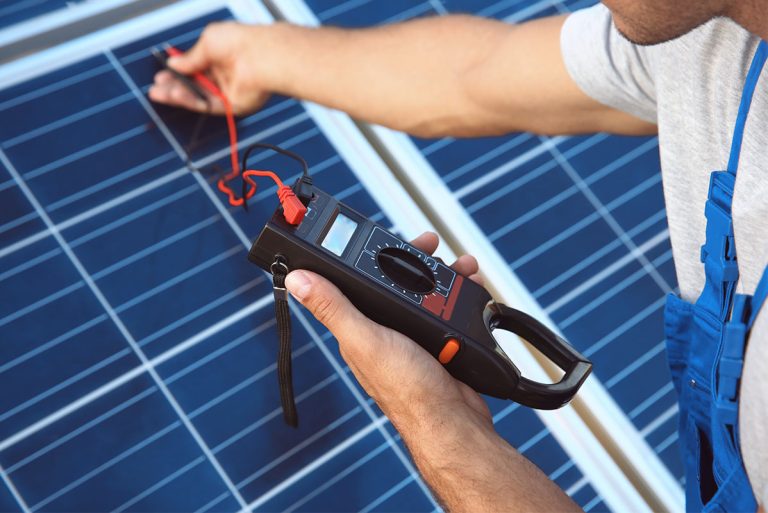
You can test this using an amp meter. Simply attach the amp meter to the positive and negative poles of your solar panel.
Make sure your panel has full sunlight before testing and that you use an amp meter with enough range so that you can accurately measure your panel’s maximum amp output.
How to measure current
Finally, in order to test a solar panel, you’ll need to know how to measure the current running through your equipment. To do this, you’ll need a multimeter and resistors.
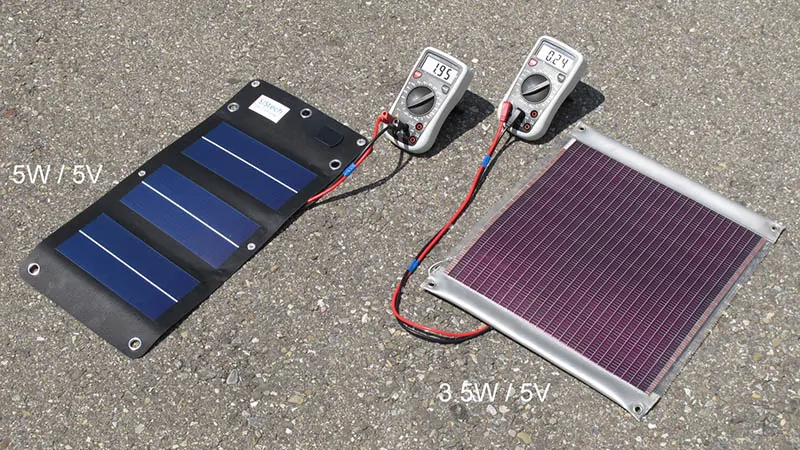
It’s important to know how to use a multimeter properly, because you could damage your solar panel if you don’t handle the equipment appropriately – we’ll explain how to do this properly below.
Also, keep in mind that not all multimeters are created equal. To be sure that you get accurate readings, invest in a reliable, high-quality multimeter.
This will give you a reading of the DC voltage, which is the electrical current.
Step-by-step guide for how to test a solar panel
WHen you test a solar panel, it’s important to do so in full sunlight; i.e. on a sunny day, at noon. Once the conditions are right, you can start following the steps below!
1. Locate the converter box
The first step testing a solar panel is to finding the converter box. This is the junction box which contains the cables that carry the electrical current from the panel to the battery.
It is usually located on the back of the solar panel. Once you’ve found it, remove the cover so that you can see the connections inside the box.
2. Identify the positive and negative connections
Before you start to test a solar panel, it’s essential to know which are the negative and positive connections. These should be clearly marked with a – symbol for negative and + for positive.
If you’re not absolutely sure, double check in the panel’s manual, or contact the manufacturer. This is critically important, because not only could mixing up these connections damage your panel, but it could also be dangerous.
3. Tilt and position your solar panel
In order to get an accurate reading of your solar panel’s maximum output, it needs to be in full sunlight. If necessary, tilt the panel so that it is directly exposed to the sun.
4. Set the multimeter to DC
Make sure the multimeter is set to DC power, and set at a higher voltage than what your solar panel is rated for, in order to capture the maximum rating. For example, if your panel is rated for 20 volts, your multimeter should be set for at least 22 volts.
If you’re not sure what your panel’s voltage rating is, you can usually find it inside the converter box.
5. Connect the alligator clips
Take the alligator clip attached to the multimeter’s red lead and attach this to the positive connection, then connect the black lead’s clip to the negative connection.
The multimeter will then give you an accurate reading of the current produced by your solar panel in volts. If the meter shows an overload, this means that you’ve set the VCD too low and you’ll need to increase it.
A brand new solar panel should give you a reading that matches, or is extremely close to, the voltage it’s rated for. If the voltage reading is significantly less than this, this indicates that something is wrong with your panel.
Solar panels tend to lose their voltage with use over time, so a used panel may have significantly less current than its rating. This is not unusual, but it’s important to know this in order to calculate how much energy your panel will provide.
How to test a 12 volt solar panel
Most solar panels are rated for 12 volts, so testing a 12-volt panel is essentially the same as the process described above. As with all tests, it’s essential that you make sure to connect the positive lead to the positive connection and the negative lead to the negative connection – to avoid damaging your panel.
Set the multimeter to more than 200 VCD to make sure you get an accurate reading.
How to test the charge controller
It’s a good idea to also test the controller at the same time as testing your solar panels. The controller is an essential power output, and you’ll need to test it in order to take advantage of solar plus storage.
Here’s how you can test your charge controller:
- Set the multimeter to measure DC Amps and make sure the leads are in the correct port for this setting.
- Set the meter to around 10A.
- Connect the solar panel to the controller, and the controller to the battery.
- Disconnect the positive cable running from the battery to the controller.
- Connect the multimeter’s positive (red) lead to the positive cable.
- Do the same with the negative’s (black) lead and the positive terminal on the battery.
The meter will then measure the current passing through the panel, to the controller, and from there to the battery.
Final thoughts
Whether you want to go fully off-grid, or simply use solar power to reduce your power use, it’s essential to know how to test a solar panel, to know how much power your panels produce. To determine this and understand how many panels you need to power your appliances and devices, you’ll need to know how to test a solar panel accurately and correctly.
Not only will this help you to optimize your system’s performance and get the most out of your solar power production, but it’s also essential if you want to sell power back to the grid.
To learn more about setting up a solar system, take a look at our guide to solar panel size, essential guide to solar panel wiring, and post on how many solar panels you’ll need to run an air conditioner.
