Fully powering your home, vehicle, cabin, or boat by the sun in 2020 has never been easier. For starters, the International Energy Agency recently stated in its 2020 Outlook report that solar energy — the “new king” of electricity — is the cheapest form of electricity ever created. So, significantly reducing or even eliminating your utility bills with DIY Solar is a near certainty now.
Better yet, the cost of materials needed for home solar has plummeted in the last decade by 70%. The biggest reason for the price drop lies in the photovoltaic (PV) panels themselves: 90% reduction in price (seen in 2019) from $2/watt to a measly $0.20/watt!
On average, in the United States between 2010 and 2020, the cost of installing a residential solar system fell from $7.50/watt to $2.50/watt. (Values vary by a dollar or two from place to place and whether you’re basing them on direct or alternating current.)
This means your upfront costs are lowered, and your payback period is shortened. In as little as 5 to 10 years — if you’ve done everything right — it’s reasonable to believe that your DIY solar system will begin making money for you. This is great for both you and the planet.
Where do you begin the do-it-your-way solar journey? Here you’ll discover all the aspects of a home solar project that you must research before implementation and operation. Following the step-by-step process outlined here ensures you’ll cover all your bases, making wise decisions and choices along the way.
DIY solar overview
Most homeowners that want to install solar end up finding an installation company, but that isn’t the only option.
Do-It-Yourselfers with a strong background or experience in electrical contracting would be able to complete a successful DIY solar project from start to finish after careful research and planning using the guidelines here.
If this sounds like you, go for it! You’re on your way to owning and operating a clean energy setup that can afford you energy self-sufficiency and a low carbon footprint for decades to come.
However, if you’re a DIYer with little to no familiarity with setting up complicated and multi-part electrical systems, a DIY solar project completed with professional help at several key points during the project — like installing and wiring — may be the more prudent option.
With experienced people on your team, you’ll avoid purchasing the wrong components or poor-quality materials. More importantly, you’ll eliminate the chance of potentially deadly accidents around high voltage. You’ll also be less likely to invalidate any warranties.
Main types of solar power systems
You have three choices for solar energy systems to power your homes and property:
- Grid-tied — Your solar array is directly connected to the public electric utility which you pull from when energy demand is higher than your system output. Any excess is sent to the grid. In most places, the electric company credits your bill.
- Grid-tied with battery backup (Hybrid) — This alternative allows you to store excess electricity produced from your solar panels at your home in a battery backup. If your batteries become fully charged, surplus electricity is sent to the grid and you get paid for it in most cases. To meet your household needs, the battery pack is activated and extinguished before the utility takes over in peak demand times.
- Off-grid — In this solar setup, you are completely independent from the public utility supply. Whatever your solar array outputs is all you have. You may attach a battery backup to avoid outages.
During the research and planning phase of your DIY solar project, you’ll have to ask yourself:
- What exactly are the electrical power needs that I want to meet with my solar installation?
- Is a grid-tie, off-grid, or hybrid setup best?
- What are the necessary permits, licenses, and inspections I must get?
- What are the best materials commercially available to me for my project?
- How do I monitor my system to be sure it’s operating at maximum efficiency and functionality all the time?
- What must I do to maintain my solar array so that it’ll work optimally during its entire life?
Which solar energy equipment and materials do you need?
In a rapidly expanding renewable energy supplies market, you have many choices for every component you must integrate to make your DIY solar system work efficiently during its entire operational life. Here’s a list of the major parts for most solar systems. (Note: You may need other elements not listed here for your unique situation.)
- Solar panels
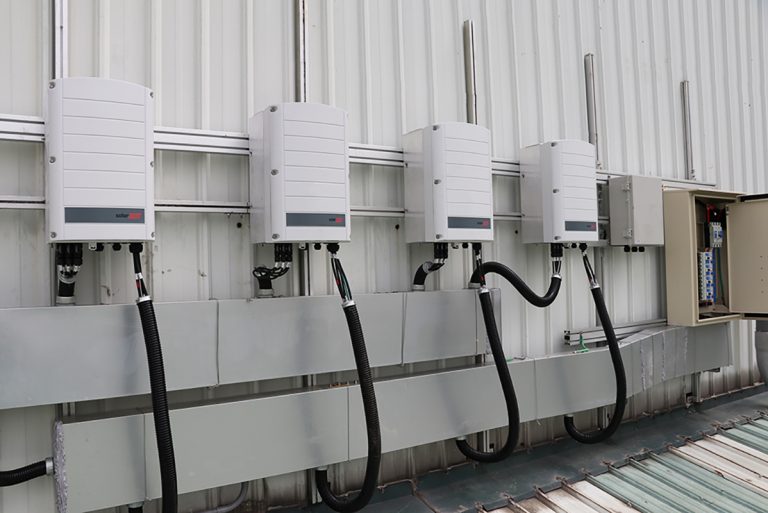
- Inverters
- Power optimizers
- Charge controllers
- PV disconnect
- Net meter
- Mounting racks or poles + brackets
- Wiring and other electrical parts
- Batteries
After all the headwork and logistics are done, you move on to the legwork: installation of PV panels on racks or poles somewhere on your property, then connecting them to your home electric panel. Depending on whether you opt for grid-tie, off-grid, or a hybrid system, further electrical connections may be needed to get everything up and running.
Pros of DIY solar
Because purchasing a solar array is a significant investment, it’s imperative that you thoroughly research your options and weigh the advantages versus the disadvantages.
Here are the major pros of a DIY solar project:
- Cheapest way to electrify your home or vehicle.
- Satisfaction of knowing you did it on your own.
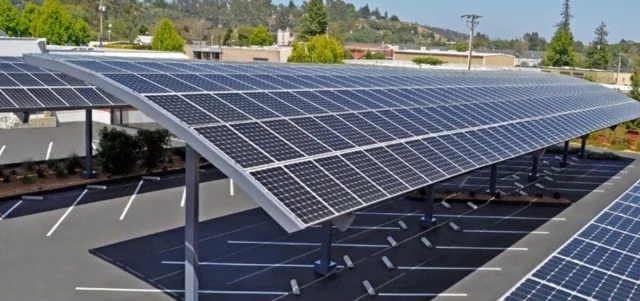
- May be more cost effective for smaller electrifying projects like outdoor lighting or a tool shed than joining them to the utility grid.
- Personally contributing to the renewable energy transformation essential to curbing our climate crisis.
Cons of DIY Solar
A do-it-your-way solar project has several disadvantages, too.
Here are the major cons to a DIY solar project:
- Build-your-own from scratch solar array requires advanced technical knowledge and expertise that you may not have.
- DIY solar home kits are usually designed to work off-grid for small projects. Today, solar kits that allow you to directly tie into the public utility grid are becoming available, and may allow you to power your entire home.
- Since the cost of a complete solar installation has plummeted in recent years, it is not as cost-effective anymore to do the labor yourself rather than use certified technicians from an accredited company.
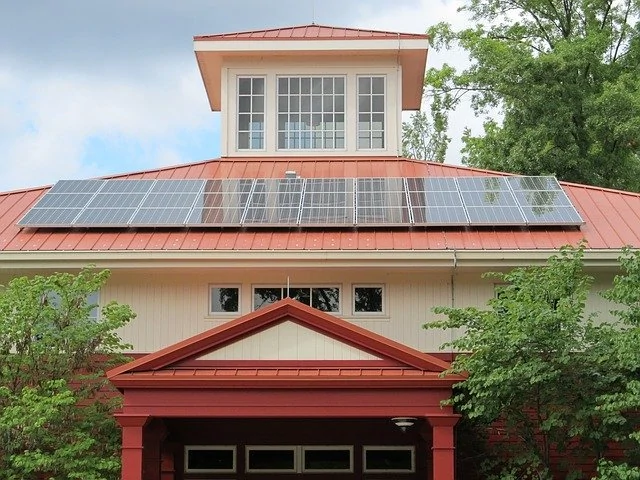
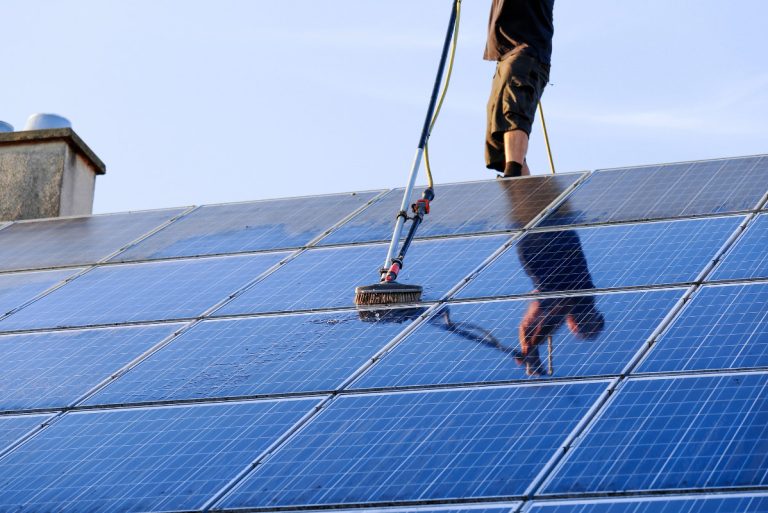
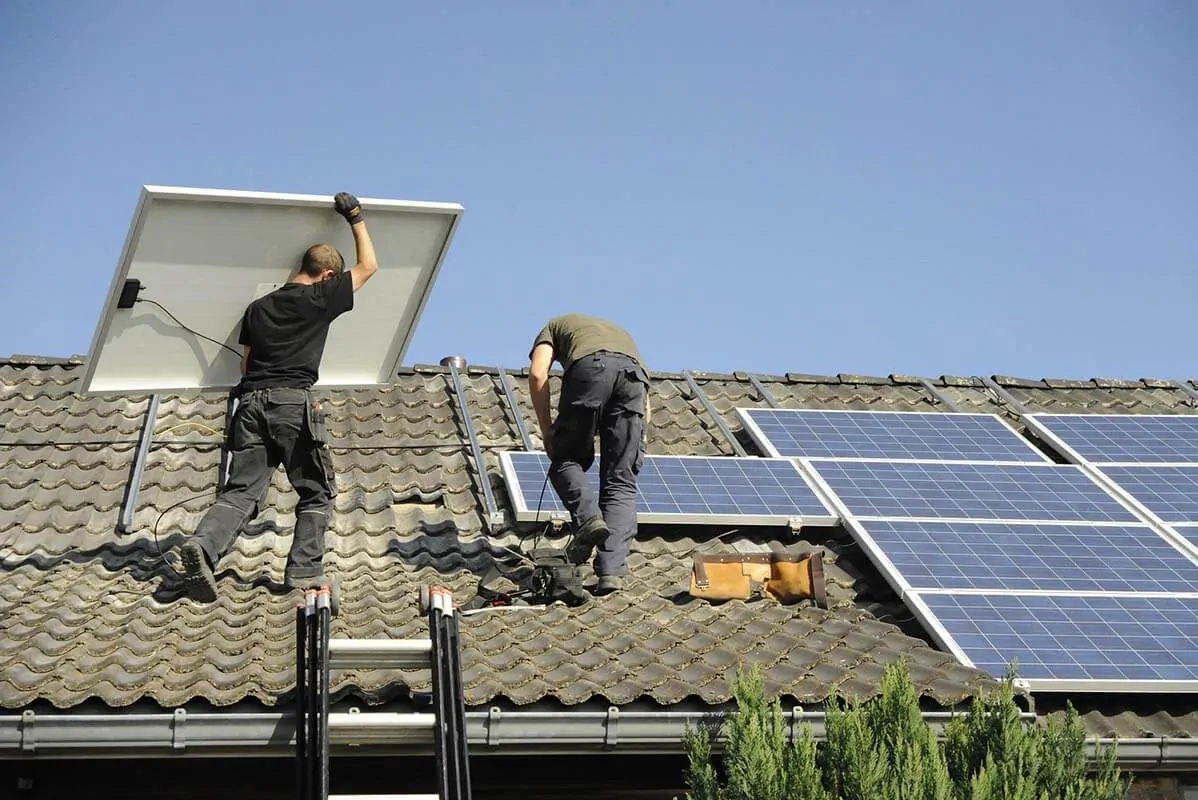
- If your project is rooftop solar, you could accidentally damage your roof when drilling holes or improperly waterproofing them.
- Damage you do to your roof will likely void the warranty on it. Insurance may not cover any resulting water or mold damage from leaks.
- Working around high voltage could easily lead to accidental electrocution and possible death if you’re unlicensed.
- If you’re installing PV panels on a roof, the risk of injury or death from falling may be too great to bear for someone inexperienced in high-altitude work.
- Installing solar yourself could prevent you from benefiting from certain local or state rebates or incentives that you’d earn if you had employed an authorized solar company.
After considering all the pros and cons of DIY solar, you may still come out in favor of doing your own project. If so, there’s a long list of things to do before you get started. When followed carefully, you can still come out ahead.
Calculating your power needs
How much electricity do you want to generate with your solar array? Answering this question is the most important aspect of your DIY solar project.
It will allow you to figure out how many solar panels you need, and, if desired, the size of your battery pack for solar storage. Your energy usage will also determine the inverter and charge controllers you need as well as the thickness of wiring and sizes of fuses.
Every electrical appliance is important to include in this calculation to get the total output wattage. You need the sum-total of all the electrical power demands from all of your appliances, like refrigerator, oven, hot water heater, computers, TVs, washing machine, dryer, hair dryers, clocks, lighting, electric baseboards, space heaters, cellphones, tablets, etc.
Begin by looking for the power consumption rating labels on all of your appliances and devices.
Some of them may have the wattage displayed. In other cases, you’ll have to figure it out based on the amperage or voltage that’s given. Use this formula to make the conversion:
Watts (W) = Volts (V) x Amps (A)
There are many online calculators to use when adding it all up. Or, you can set up a table like this:
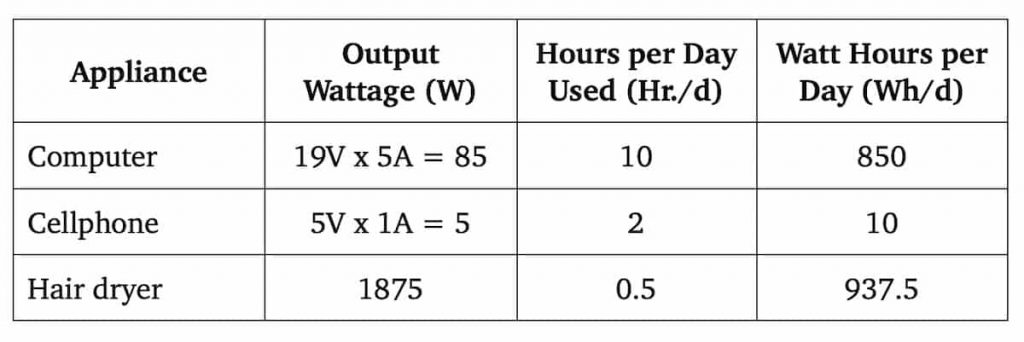
Note: To fill out the fourth column, multiply the output wattage (column 2) by the number of hours of use per day (column 3). Then add up all the values in the fourth column to get the total wattage you use per day expressed in kilowatt-hours (kWh).
For all types of DIY solar projects, use the number of kilowatt-hours (kWh) you use to do several calculations to figure out the number and voltage of solar panels you need to fully power your project. A free online calculator can simplify it and many other calculations related to your DIY solar project.
DIY grid-tie solar
In a grid-tie solar setup, you are directly connected to a public electric utility’s grid. This means that when your solar array produces more electricity than you need, it goes to the grid and becomes available for consumption by others.
In most cases, your electric company pays you for this energy through a program called net metering. This means the excess renewable energy turns back your electric meter as it goes to the grid so that your overall energy usage (that you pay for) is lowered.
Whether your electric supplier reimburses you at a retail or a wholesale rate depends on where you live. Unfortunately, not all states permit net metering.
To find out more information on your state’s net metering rules, visit DSIRE (Database of State Incentives for Renewables & Efficiency).

In a grid-tie system, when your energy demands are higher than what your solar array can provide — like at night or when your panels are covered by snow — the electric grid sends the power you need to your home, avoiding interruptions.
Gear required for a grid-tie solar system
In a grid-tie, sometimes called on-grid, solar setup for rooftop, there are a few basic components needed for proper functioning.
- PV panels
- Mounting hardware
- Pure sine wave inverter suitable to a grid-tie setup (converts direct current from PVs into alternating current for home use; pumps extra AC back out to utility grid)
- DC or power optimizer (maximizes the energy retrieved from your solar cells)
- Grid disconnect (to shut off your system during an outage)
- DC disconnect (to turn off your array for maintenance)
- Combiner box (keeps all components organized in one place)
Note: There are three different types of inverters that could work in a grid-tie system. Whatever your choice, make sure it’s a pure sine wave type of inverter. (See below in the off-grid section for more on this).
String inverter
String inverters are the most economical if you have a south-facing home with no shading issues. With this inverter, electric current from strings of several panels each are connected and feed into the inverter. If one panel in the string is affected by shading or it malfunctions, energy output from that entire string is reduced.
String inverter with a DC optimizer technology
A string inverter with DC optimizer technology overcomes this problem. A separate power optimizer is attached to each solar module in your array and functions independently of all the rest. All the DC coming from the optimizers is channeled to the inverter where the DC-AC conversion happens.
With this type of inverter, shading or malfunction would affect only specific panels (not an entire string). It is possible to monitor each panel’s operation with this type of inverter.
Microinverter
A microinverter is a type of inverter attached at each panel. DC to AC conversion occurs there. Then, the AC is channeled together from your roof and feeds directly to your home AC breaker box.
This type of inverter is the simplest to install. It also allows you to enlarge your solar array with other types or models of PV panels, each with their own microinverter. (To expand a solar array using string inverters, by contrast, you must use the same type of panel.)
When you consider all factors, the grid-tie system is actually the simplest and least expensive setup. Off-grid and hybrid systems require — in addition to the basic parts listed above of a grid-tie system — charge controllers, a battery bank, and other additional overcurrent protectors.
We have dedicated posts on the best solar inverters you can buy, as well as the difference between micro inverter vs string inverter.
DIY off-grid solar systems
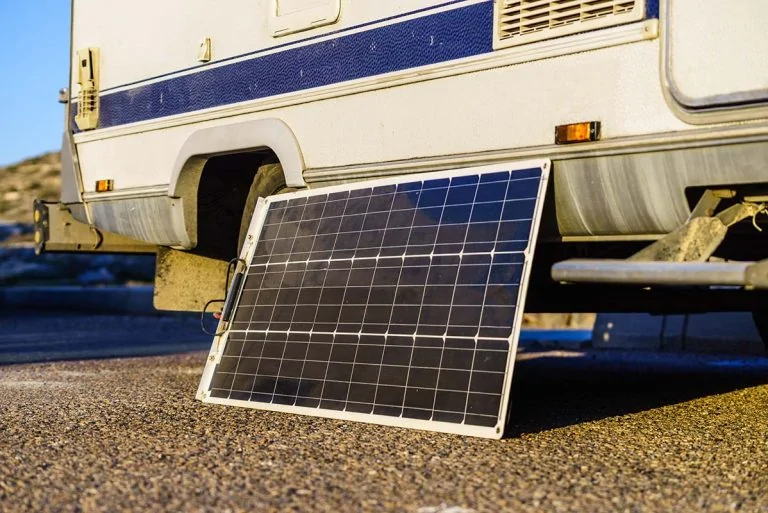
If you’re interested in living off the grid in any way, or if you’re far from a public utility, a DIY off-grid — sometimes called stand-alone — solar array is a no-brainer. The good news for 2020: Your off-grid solar possibilities are literally endless whether you’re electrifying a remote cabin, a van or RV or even a boat.
Gear required for off-grid solar systems
The essential components of an off-grid system are similar to a grid-tie setup with the addition of:
- Charge controller (sends DC to your backup battery bank but shuts it off from time to time to prevent overcharging)
- Battery bank (needed to supply power when sun isn’t shining)
- Inverter (modified or pure sine wave depending on your power needs)
- Balance of system (BoS) components (wires, fuses, breaker box, etc.)
The following short video from Su-Kam Solar describes the different uses for pure sine wave versus modified sine wave inverters. Not only will you see the difference in the graphical illustrations of both; you will hear the contrasts, too.
Determine your power needs for an off-grid solar system
For any type of DIY solar project, you must determine your power needs as previously discussed. With off-grid, you take that value and figure out the number of batteries you’ll need to store it in. If you’d prefer to have a supply that lasts for several days or weeks, you must take that into account, too.
This gets complicated with batteries since they’re rated to be stored at room temperature or slightly above. This means their storage capacity is significantly reduced (50% or more) if you’re in freezing conditions. So, when you’re in a cold location or season, you may need to increase your battery bank size significantly for this reason alone.
Battery voltage
The voltage of your battery bank — whether 12V, 24V, or 48V — matters, too. It affects the thickness (and price) of the connecting wires between them and the cable going to the inverter.
To determine the voltage, consider how many watts you need to power all your appliances. A 12V battery bank may be adequate for a cellphone and a few 12V DC appliances. But if you’re looking at generating 2,000 watts or more, a 24V or 48V battery pack makes more sense.
Sun hours
Yet another important consideration is the number of sun hours that your panels will receive every day. This number does not equal the length of daylight and varies with the seasons.
It depends on the angle of the sun in relation to your panels’ orientation. Maps of sun hours for the U.S. are available through the National Renewable Energy Laboratory (NREL).

Image source: NREL
Charge controller
Once you know the voltage of your solar array and your battery pack voltage, you need a charge controller to manage the two. There are two basic types of charge controller technologies available now: PWM (pulse width modulation) or MPPT (maximum power point tracking).
When the voltages match, a PWM charge controller is adequate. When the voltages are different, go with a MPPT controller.
DC/AC converter
Last but not least is the inverter you need to convert DC from the modules into AC for appliances that run on AC. Furthermore, you need to know what type of AC is required by the inverter. In the U.S., it’s 120/240V split phase, 60 Hz.
Although some inverters can be configured, others are fixed. Check the inverter specifications sheet (in the manual or on the company website) before you purchase to make sure you have the one your system requires.
Further considerations
A further complicating factor is that some appliances use 240V while others use 120V. Not all inverters churn out 240V, so you may need to stack (that is, wire together) two inverters, each rated at 120V, to meet all of your power needs. Again, check the spec sheet to be sure you’re using the correct equipment.
One last thing: An inverter is designed to match a specific battery bank — whether 12V, 24V, or 48V. So, you need to decide which battery bank size you’ll be using before you purchase the inverter.
If you think you may want to build up your solar array and/or your battery storage capability in the future, buying an inverter now that can handle the additional voltage will save you from having to do a costly inverter upgrade later.
DIY hybrid solar systems
Combining features from both grid-tie and off-grid solar systems, hybrid systems enjoy the best of both worlds. You can store your solar power for use at night or in power outages.
This is ideal for homeowners in certain areas who would otherwise have to pay higher peak rates for grid electricity in the evenings or at night.
However, if you have good net metering in your area and power outages are minimal, a standard grid-tie system may be your best choice.
Below is a diagram that illustrates how a hybrid system works:
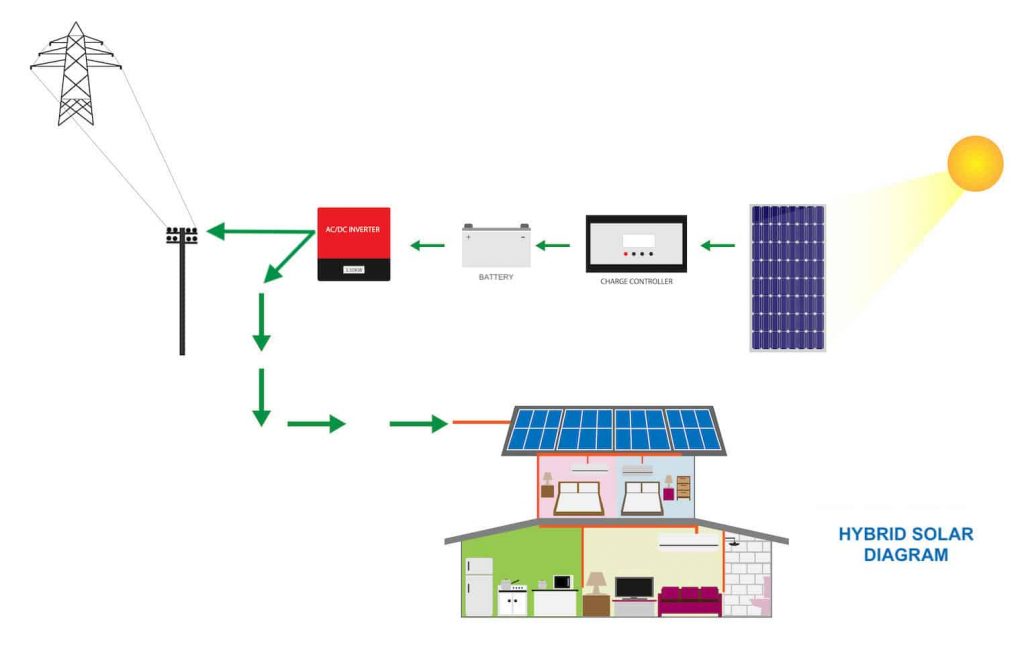
As the graphic shows, a special hybrid inverter is used in this type of system. It’s also important to note that if you opt for this setup, you should purchase the batteries at the time of installation. Battery technology is advancing rapidly, possibly resulting in non-compatibility with your hybrid system if you wait too long. This could mean a lot of costly upgrades for you later.
For hybrid systems, AC-coupled batteries are common. These batteries store both DC from your solar array and the grid AC as alternating current (AC). Currently, the Tesla Powerwall is one of the most popular choices for an AC-coupled battery.
By contrast, a DC-coupled battery stores the DC from your solar panels and converts the AC from the power grid to DC which is stored in the battery as well.
A photovoltaic system using a DC-coupled battery is more energy efficient than current AC-coupled batteries. This difference is more pronounced with a large-scale installation. So, it probably won’t affect your home solar installation efficiency.
Which type of solar panel is best for your DIY solar project?
There are three major types of solar panels available for residential projects.
Monocrystalline solar modules consist of 60 or 72 solar cells made of silicon uniformly black in color covered in glass and framed in metal. Each cell has rounded white edges. Monocrystalline panels are slightly more expensive than other types, but considerably more efficient. They convert up to 23% of sunlight to electricity.
Polycrystalline solar panels also contain 60 or 72 solar cells, each one perfectly square in a mottled blue color. They convert about 15%-17% of sunpower into usable electrical energy. Polycrystalline panels are slightly less expensive than monocrystalline modules.
Thin film solar cells are lightweight and flexible sheets of a photovoltaic material applied to a solid surface like glass. Thin films are even less efficient than the other types, usually only 10-13%. They are also cheaper. For more details check our guide to the best flexible solar panels.
Choosing the right solar panels for the job
If you’re limited on space for your DIY solar project, monocrystalline panels are the best option due to their greatest efficiency and similar cost to their polycrystalline cousins.
Polycrystalline panels may be suitable if space is not an issue and you’re trying to reduce costs — even in small ways.
Thin films aren’t suitable for small-scale solar installation projects, nor are they worth it.
FAQs about DIY solar
For a project as complicated and expensive as DIY solar, you absolutely need to get it right. Here are some questions you may have been wondering about with answers.
1. Is a grid-tie, off-grid, or hybrid solar system best for a DIY solar project?
There is no right answer to this question. It totally depends on your goals, technical knowledge, electrical experience, energy needs, and your location.
For example, if your goal is to power your entire 2,000 sq. ft. home for a family of four, and you have net metering with rare power outages, a grid-tie system is the most economical.
However, if you want to electrify a secluded hunting shelter only in the fall, an off-grid solar system is your best bet.
A hybrid solar system is the best option if you do not have access to net metering, your utility charges high rates in times of peak usage, or you’re subject to frequent power shutoffs or outages.
2. What are the hidden costs of a DIY solar project?
There are multiple permits and inspections — from your local jurisdiction and power company — that you must pay for before your DIY solar project can go live. Consult with them to know what you must do and when in the process. Missing even one could delay or even prevent your project’s completion.
But before you even get started doing the research for your solar system, check to be sure a non-licensed homeowner can install a grid-tie solar array. If not, you will have to involve a licensed solar company. This could be several thousand dollars more than you initially budgeted.
Your home insurance could increase due to the panels on your roof or property. Contact your agent before you get started to determine if the annual increase is within your budget.
If you’re not totally sure you’ve purchased all the right componentry, make sure that they’re returnable before you even take them out of the box. If you’re wrong and need to switch out materials, you’ll be disappointed by the extra expense if you can’t be refunded for the item(s).
3. Am I eligible for any tax breaks as an independent homeowner doing the solar installation?
In the U.S., the federal solar tax credit, also called the investment tax credit (ITC), allows you to deduct 26% (reduced to 22% in 2021) of the cost of your solar install with no cap. You may do this as the installer or if you hire a company to do the work.
At this point, there is no plan to extend this tax credit past 2021 to homeowners under the current Administration, although a newly elected executive branch and Congress could do so.
Solar Renewable Energy Certificates (SRECs) are another incentive homeowners have. With this program, you sell energy certificates to your utility and get cash back. The system works like the stock exchange. SREC values vary from state to state and month to month.
You must check with your state and local authorities to find out about any other incentives or rebates. These may be conditional on your hiring an approved solar company to perform the installation.
Wrap up on DIY solar
The most important part of a DIY solar project is in the planning and design. For these steps you must do a lot of research.
A critical number needed for all calculations is the number of watt hours of electricity consumed in a day by all of the appliances you’d like to be supplied by your solar array. If you include battery storage, knowing how many days worth of power you’d like in reserve is essential, too.
Once you figure that out, purchasing the necessary components for your grid-tie, off-grid, or hybrid system is next.
After acquiring all necessary permits and getting inspected, you install the panels. Before they go live and start producing electricity, another inspection or two is mandatory.
Your DIY solar project, when done correctly, can provide you with decades of clean energy. That’s a win-win for you and the planet.